Thinking of You/Pumpkin
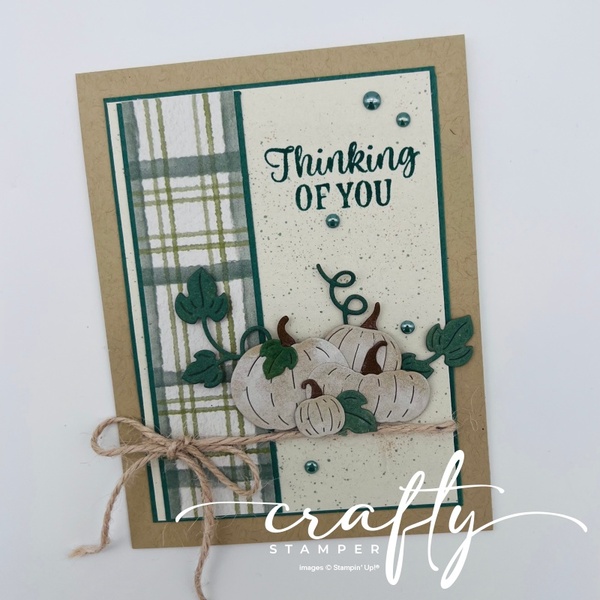
Card Base
- Cut & Score: Cut Crumb Cake Cardstock to 4-1/4″ x 11″. Score at 5-1/2″ and fold on the score line.
Card Front
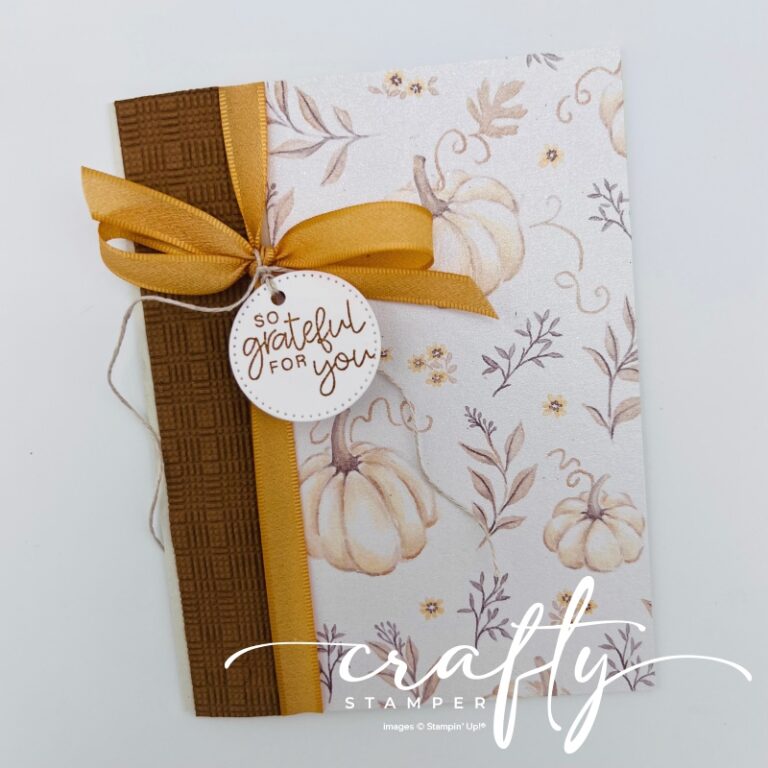
- Create the Card Front Layers: Cut Peaceful Pine Cardstock to 4-7/8″ x 3-5/8″. Cut Basic Beige Cardstock to 4-3/4″ x 3-1/2″. Adhere the Basic Beige layer to the Peaceful Pine layer, then adhere the completed layers to the card base.
- Create the DSP Panel: Cut Peaceful Pine Cardstock to 1-3/8″ x 4-3/4″. Cut Waterside Retreat Designer Series Paper to 1-1/4″ x 4-3/4″. Adhere the DSP to the Peaceful Pine layer, then adhere the completed panel to the card front as shown. Neutrals Jute around the card layers and tie a bow, as shown. Adhere the completed layers to the card base.
- Create the Pumpkins: Using the Painted Pumpkin Dies, cut the pumpkins from Basic Beige Cardstock. Using a sponge and the Whisper White Stamp Pad, lightly add color to the pumpkins to create soft highlights and dimension. Add Stampin’ Dimensionals to the back of the pumpkins.
- Create the Leaves: Using the Painted Pumpkin Dies, cut the leaves from Basic Beige Cardstock. Using a Blending Brush and the Peaceful Pine Stamp Pad, blend color onto the leaves. Leave some areas lighter and others darker to create depth and dimension. Adhere the leaves to the card front as shown.
- Add the Splatter: Using Peaceful Pine and Pecan Pie Stampin’ Write Markers, add splatter to the card front by flicking the brush tip of each marker against a Bone Folder. This adds a little extra color, texture, and interest to the background.
- Stamp the Sentiment: Using the Peaceful Pine Stamp Pad, stamp the sentiment on the card front as shown.
- Assemble the Pumpkins & Leaves: Arrange and adhere the pumpkins and leaves to the card front as shown.
- Add the Embellishments: Using the 2026–2028 In Color Dots, add the embellishments to the card front as shown.
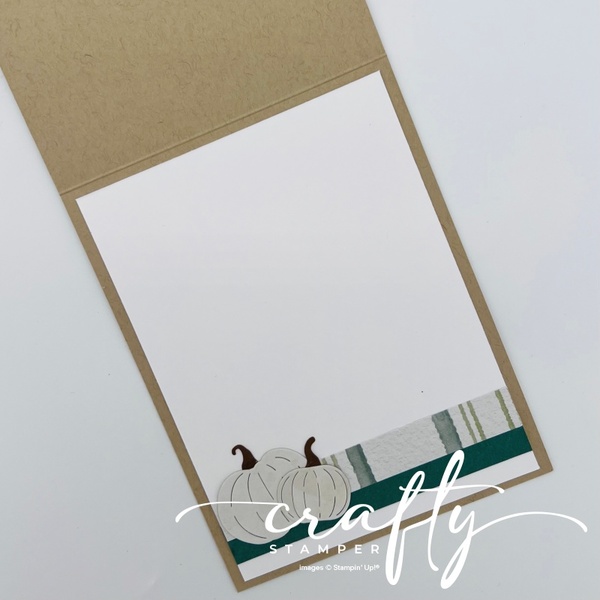
Inside of the Card
- Create the Inside Layer: Cut Basic White Cardstock to 4″ x 5-1/4″.
- Create the Decorative Strip: Cut Waterside Retreat Designer Series Paper to 1/2″ x 4″. Cut Peaceful Pine Cardstock to 1/2″ x 4″. Layer and adhere the strips to the Basic White layer as shown.
- Add the Pumpkin: Using the Painted Pumpkin Dies, cut a pumpkin from Basic Beige Cardstock. Using a sponge and the Whisper White Stamp Pad, lightly add color to the pumpkin. Adhere the pumpkin to the inside layer as shown.
- Complete the Inside: Adhere the completed Basic White layer to the inside of the card base.
🌻 Crafty Stamper Tip
Fall doesn’t always have to mean orange! Try cutting your pumpkins from a neutral cardstock and adding soft highlights with ink. Pairing neutral pumpkins with an earthy green creates a softer fall look while still giving your card plenty of autumn personality. 🍂
NOTE: I used the Painted Pumpkin Dies to create the pumpkins and leaves for this card. The sentiment came from the Radiant Sunflowers Stamp Set. These products will be available to customers beginning September 1, so it cannot be added to the product list at this time.