Pretty Poinsettia
Card Base
- Cut Real Red Cardstock to 11″ x 4-1/4″.
- Score the cardstock at 5-1/2″ and 6-3/4″.
- Fold on both score lines and burnish the folds with a Bone Folder.
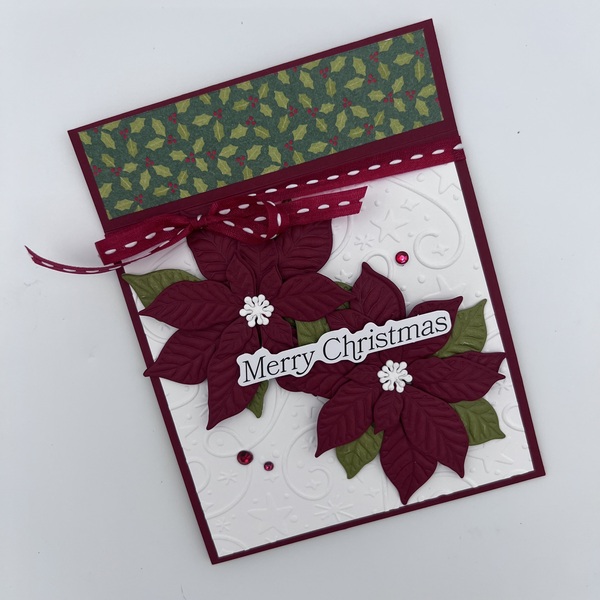
- The narrow front flap creates the book fold design.
Front of the Card
Add the Designer Series Paper
- Adhere the 1″ x 4″ piece of A Stitched Season Designer Series Paper to the narrow front flap (the left book-fold panel).
Create the Background
- Emboss the 4″ x 4″ Basic White Cardstock using the Swirls of Magic Embossing Folder.
- Adhere the embossed Basic White layer to the large front panel of the Real Red card base.
Create the Poinsettias
- Using Cherry Cobbler Cardstock, die cut 2 complete poinsettia sets using the Pretty Poinsettia Dies.
- Die cut 2 poinsettia centers from Basic White Cardstock.
- Using Old Olive Cardstock, die cut the poinsettia leaf pieces twice.
🍃 Crafty Stamper Tip 🍃
For added texture and dimension, leave each poinsettia layer inside the cutting die after die cutting. Lightly spritz the cardstock with water, then run it through your die-cutting machine using the impression plate. This creates beautiful embossed detail on each petal.
Complete this step for the first poinsettia before repeating the process for the second set.
- Once all of the pieces have been embossed, assemble the poinsettias using Multipurpose Liquid Glue.
- Layer the flowers as shown in the sample and adhere the Basic White centers to complete each poinsettia.
Add the Ribbon & Embellishments
- Wrap the Stitched Ribbon around the narrow book-fold flap, bringing the ends to the front of the card to form a bow.
- Color one small, one medium, and one large Rhinestone Basic Jewel with a Cherry Cobbler Stampin’ Blends Marker.
- Adhere the colored rhinestones to the front of the card as shown in the sample.
Inside of the Card
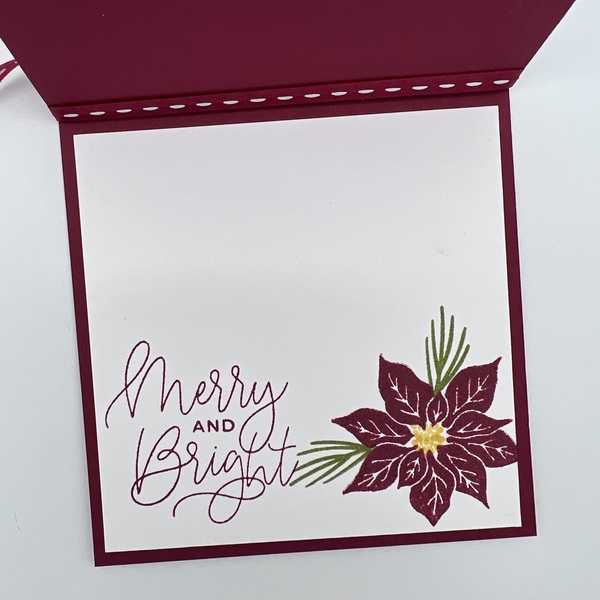
- Adhere the 4″ x 4″ Basic White Cardstock layer to the inside of the card.
- Stamp the sentiment from the Pretty Poinsettia Stamp Set using Cherry Cobbler ink.
- Stamp the Poinsettia in Cherry Cobbler ink.
- Stamp the center of the poinsettia in Daffodil Delight ink.
- Stamp the sprigs in Old Olive ink to complete the design.
🍃 Crafty Stamper Tip 🍃
Before adhering your embellishments, place them on your card and take a quick photo with your phone. Seeing your design through the camera often helps you notice spacing or placement adjustments before everything is permanently attached.